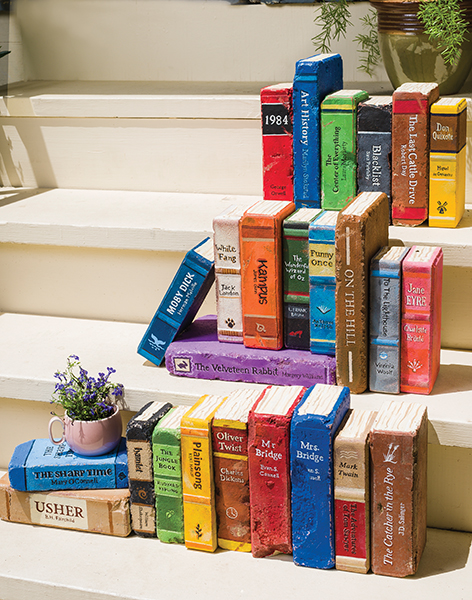
You may have noticed the cover of the July, 2014 issue of Kansas Alumni magazine, which featured bright, sunny porch steps stacked with colorful “books.” The library consisted of hand-painted bricks and pavers painted to look like old books featuring KU authors and other classics. If you are into crafty projects, you may have seen this popular idea online. Google “book bricks” and you’ll find more tutorials and how-to videos. In fact, our Associate editor, Chris Lazzarino, first spotted this idea, and we thought it would be fun to do. The bricks make great bookends, garden art, or even a nice focal point on a windowsill or shelf.
The books are fairly easy—the hardest part may be deciding your favorite classics— and can be made by anyone. If you don’t feel up to hand-painting the lettering, you can use alphabet stickers found at most craft stores. We kept our books simple, decorating only the spine, which is really all that shows if you choose to use them as bookends. Painting on bricks is a rough endeavor, so embrace the imperfections and don’t strive for perfect lines!
Step 1: Bricks and Pavers
Gather old bricks if you can find them, or buy an assortment of pavers from a garden or home improvement store. If you are using old bricks that have a little bit of moss on them, first soak them in a light solution of water and bleach (about 1/4 cup to 1 gallon of water), and then scrub them to remove the moss. Let the bricks dry several hours or overnight. If you are using pavers that you have just bought, they tend to be dusty so rinse them off well and let them dry several hours or overnight.
Step 2: Supplies
For other supplies, you will need acrylic paint, brushes, blue painters masking tape, tracing paper, and computer printouts of book titles (or use alphabet stickers for the lettering). You can use inexpensive paint for this project. In fact, the liquid acrylic that you can buy in bottles at the craft store are perfect for this. You also need to have an assortment of brushes on hand, from wide flat brushes, to small narrow brushes for lettering. Use bristle brushes—foam brushes will not hold up against the surface of the brick.
Step 3: Base coat
Paint your bricks and pavers with a white coat of paint. This helps seal in the porous surface, and will help you get even coverage when you apply more coats of color.
Step 4: “Pages”
To created weathered-looking pages, paint three edges with an off-white or cream paint. Add a second coat. When the paint is mostly dry, use a darker tan and with a long narrow brush, paint lines along the pages. Broken lines work well, and we are going for a rough, weathered look here, so wiggle the brush and don’t worry that the lines aren’t straight. Add additional lines with white paint to achieve the look.
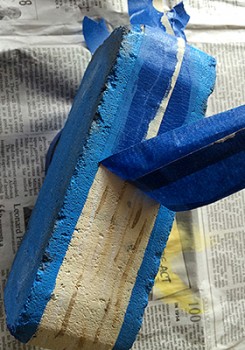
Step 5: Book Covers
Make sure the paint on the “page” area is thoroughly dry, and then tape over the edge, leaving a margin for the book cover. (Be sure to press the tape down on the edges well.) Paint your book with a solid color, adding two coats. Add a little black paint to your book color, and add the deeper tone to cracks and creases in the brick. Use a wet paper towel to blend the dark color in and wipe away the paint that is not in the cracks. Next, add a little white for highlights to the cover. This is easy to do with “finger-painting.” Dip your finger in a little paint, wipe most of it off on newspaper or a paper towel, and then lightly rub across your book. Adding the deeper tones and highlights help give the book a bit of dimension.

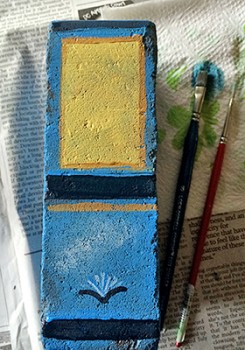
Step 6: Spine and Details
The next step is to embellish the spine. Add panels for the book titles, stripes, and symbols. Most publishers used a small symbol or brand on their spines, and adding a small embellishment to mimic this can add to the effect. When the book is completely dry, remove the tape that protected the “page” part of the book. Even if your page paint was thoroughly dry when you taped it, you may remove some paint when you strip off the tape. Don’t worry about this, the random spots will add to the aged look of your books, or you can go back and touch up with paint if you prefer.
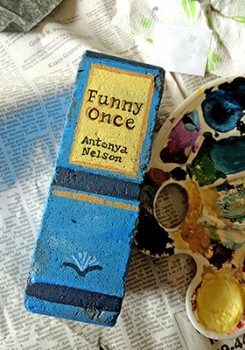
Step 7: Lettering
We printed out book titles from the computer, and then traced them onto the books before we hand-lettered them. You can totally wing it if you feel comfortable, or you can use small alphabet stickers. (Stickers not recommended if you will use these books outdoors). For help with hand-lettering, have a good tracing paper to transfer the title. Speedball’s “Mona Lisa” tracing paper has dark carbon, and it shows up well on the rough surface of the brick or paver. Tape a piece of tracing paper in place, and then trace your printout. The result will be rough because of the surface of the brick, but it should give you enough to go on. Carefully paint your lettering, dark paint on light surfaces, and light paint on dark surfaces. Don’t worry if your lettering is rough, it just adds to the charm!
Paint a “drop shadow” to the left of the letters, which will help the title pop a bit. If you want, add the title to the front of the book as well, especially if you plan to use the books as pavers in a garden.

Step 8: Sanding
Use a very rough sandpaper (we used 60 grit), to sand along the edges and rough up the bricks. If desired, drag the sandpaper across random areas to remove paint.
And that’s it! Have fun making your own colorful library of brick “books.” Recreate your favorite childhood stories, plan a themed collection for a boy or a girl, or decorate a windowsill near your favorite reading nook. These would also look great edging a garden area. If you plan to use them outside, you might want to coat them with a matte-finish spar varnish so that the paint will last longer. Have fun and be sure to send us photos of your “new” books.
—Susan Younger, Creative Director
Photograph of books on steps by Steve Puppe, copyright www.stevepuppe.com
Photographs of the process by Susan Younger
Hawk Link also serves as a community-builder on the KU department side, with collaborative events supporting their common goal of supporting student success.
Last semester, over 400 students attended Fuel Up for Finals with Hawk Link and KU Libraries offering build-your-own finals survival kits. This semester Hawk Link, Student Union Activities (SUA) and International Support Services (ISS) are hosting International Student Night at a KU women’s basketball game on February 18.
“We’re trying to get the word out to more people to get students engaged,” says Coury. “While they’re here on campus, it’s so important that they find community and networking, and that is done through programming. Because if you just have one friend that says, ‘Hey, let’s go to the SUA event,’ then they’re not going by themselves. You have to get out of your room. You have to get out of your comfort zone. You can’t just sit and wait.”
Montenegro and Croatia
Once we departed from Greece, we set sail to Kotor, Montenegro. We stepped off the ship, engrossed in the beautiful views of rugged peaks mirrored in the bay. Along with our Jayhawk friends, we were whisked away on tuk tuks to explore the town along the Adriatic. We noticed fortified walls we later stepped through to be warped into Kotor’s Old Town. Our young tour guide navigated us along curvy roads past striking views as he entertained us with stories about Kotor’s deep history. We learned about the three sisters who were in love with the same young sailor and saw our guide’s home. Interacting with a local in this capacity was so enjoyable because we got a glimpse of what life looks like in Kotor. We arrived at Porto Montenegro, a secluded portside filled with luxury boutiques, waterside cafes and superyachts. After 30 minutes of speed shopping, we got back on the tuk tuk and took an alternate way back to the ship so that we couldexperience the most sought-after lookout point in Kotor. We followed our tour with a stroll through Old Town, past medieval buildings and charming squares with a freshly baked pastry in hand. The Cathedral of Saint Tryphon took the cake of our time in Kotor!
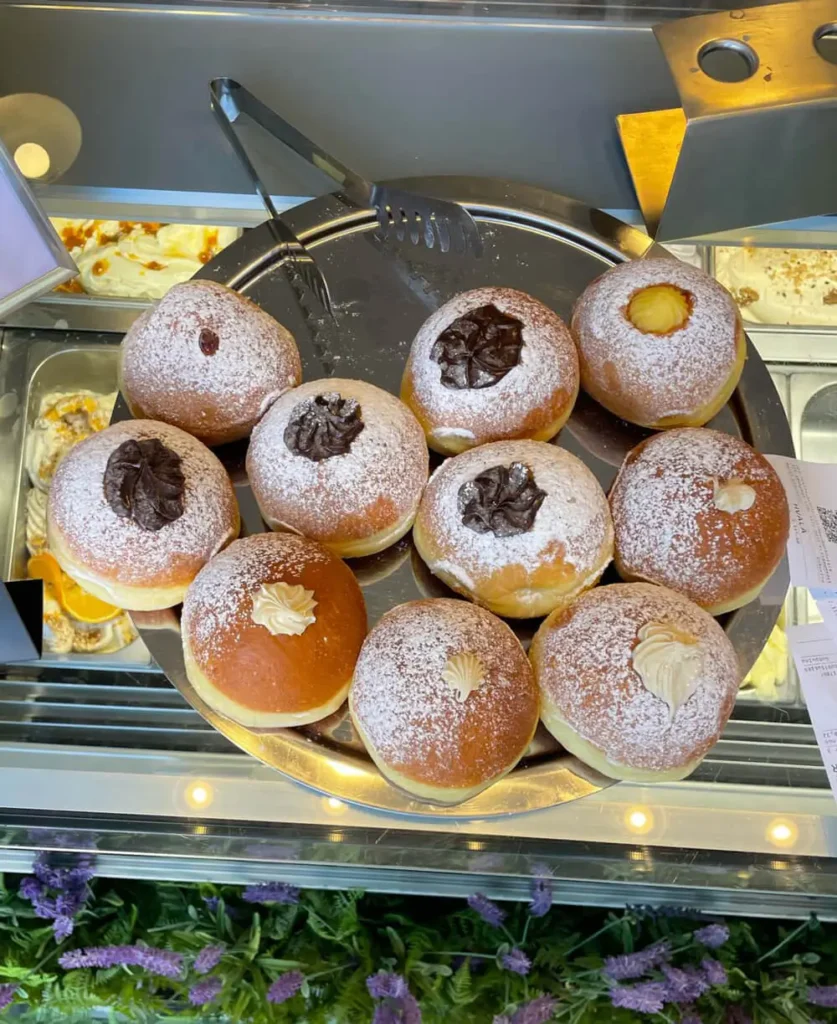
Our final destination before disembarkation of our ship in Venice was Split, Croatia. As the morning subsided, Split was bustling with energy. Split showed elements of both modern life and Roman ruins. The Riva Promenade couldn’t be missed as we ventured further into the city. The lines of palm trees and benches to rest on and admire the views of the port while savoring Krofnes, fluffy-filled Croatian donuts, were just what we needed after an adventure-filled week. Our favorite details of Split were the hidden courtyards and lively markets.